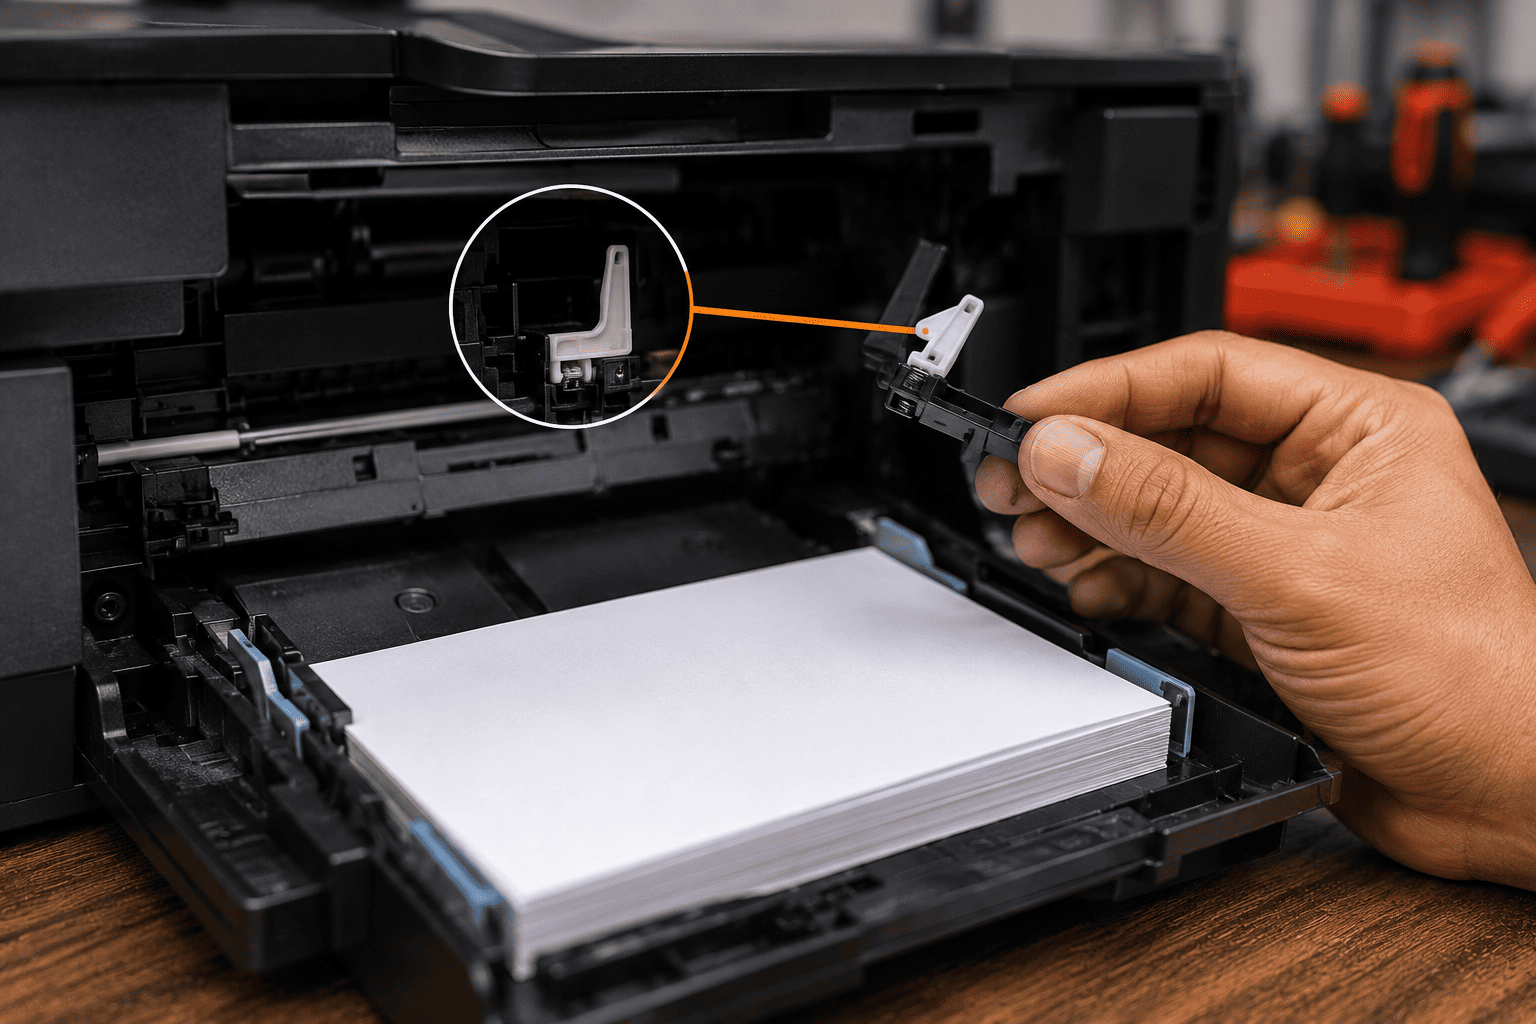
A printer that says “Paper Out” even when the paper tray is full may have a paper detection problem rather than a paper supply problem. In many printers, a small sensor arm or flag moves when paper is loaded and signals the printer that media is available.
If the sensor arm is stuck, bent, displaced, blocked by debris, or not aligned with the optical sensor, the printer may incorrectly report that the tray is empty. A damaged paper sensor, tray mechanism, or related wiring can create similar symptoms.
Problem
The customer has a printer with sufficient paper in the tray, but the printer continues to display “Paper Out,” “Load Paper,” or a similar message.
The printer may refuse to print because it incorrectly believes that paper is not present.
What Problem Is the Customer Facing?
Customers may experience:
- Printer says “Paper Out” when the tray is full
- Printer repeatedly asks to load paper
- Printer refuses to start a print job
- Paper tray is correctly loaded but not detected
- Printer detects paper only occasionally
- Printer works after pushing the tray inward
- Paper detection changes when the tray is removed and reinserted
- Printer reports the wrong paper size or tray status
- Paper sensor appears stuck
- Printer displays a paper-related error without attempting to feed paper
Root Causes of the Problem
1. Paper Sensor Arm Is Stuck
The sensor arm should move when paper is loaded into the tray.
Dust, paper scraps, labels, or mechanical damage can prevent it from moving freely.
2. Sensor Flag Is Misaligned
The small plastic flag or actuator may have shifted from its correct position.
If the flag does not properly interact with the sensor, the printer may incorrectly interpret the tray as empty.
3. Broken or Bent Sensor Arm
A damaged sensor arm may not reach the paper stack correctly.
This can happen because of rough tray handling, paper jams, or physical damage.
4. Paper Debris or Foreign Objects
Small pieces of torn paper can become trapped around the paper detection mechanism.
Even a small obstruction can prevent the sensor arm from moving correctly.
5. Paper Tray Misalignment
A tray that is not seated correctly may fail to position the paper stack and sensor mechanism properly.
The printer may therefore report that no paper is available.
6. Damaged Optical or Mechanical Sensor
If the sensor itself is damaged, realigning the actuator may not solve the problem.
The sensor may require further testing or replacement.
7. Incorrect Paper Loading
Paper that is overloaded, poorly aligned, curled, or positioned incorrectly can prevent the detection mechanism from operating normally.
8. Sensor Wiring or Connector Problem
A loose connector, damaged cable, or faulty connection between the sensor and printer control board can also cause incorrect paper detection.
How Can Customers Identify the Issue?
Look for:
- Paper tray is visibly full but printer says “Paper Out”
- Printer detects paper only after moving the tray
- Printer works temporarily after removing and reinserting the tray
- Sensor arm appears stuck or does not move freely
- Printer recently experienced a paper jam
- Small paper scraps are visible inside the tray mechanism
- Paper detection is intermittent
- Printer reports an empty tray even with correctly loaded paper
- Paper is loaded correctly but the printer does not attempt to feed it
- The problem continues with different paper
- Another tray works normally while one tray reports “Paper Out”
Possible Solutions
1. Check the Paper Tray
Remove the tray and inspect it for:
- Torn paper
- Foreign objects
- Excessive paper
- Damaged guides
- Bent plastic components
- Incorrect paper placement
Reload the paper according to the printer manufacturer's instructions.
2. Inspect the Sensor Arm
With the printer powered off and disconnected from power, a technician can inspect the paper sensor arm.
Check whether it:
- Moves freely
- Returns to its normal position
- Is bent
- Is broken
- Is obstructed by paper debris
- Correctly reaches the paper stack
Do not force the arm because small plastic components can break easily.
3. Clean the Paper Detection Area
Dust and paper debris can interfere with the sensor mechanism.
A technician can carefully clean the area around the sensor arm, flag, and paper path using appropriate printer-cleaning procedures.
Avoid damaging delicate optical sensors or using excessive force.
4. Realign the Sensor Flag
If the sensor flag has shifted from its correct position, it may need to be carefully realigned.
The exact position differs between printer models, so the manufacturer's service documentation should be followed whenever available.
5. Check the Paper Tray Alignment
Make sure the tray:
- Slides in completely
- Locks into position
- Is not cracked
- Has correctly positioned paper guides
- Does not sit loosely inside the printer
A tray that is slightly misaligned can prevent the paper sensor from detecting the media correctly.
6. Check for Hidden Paper Jam Debris
A printer can have small pieces of paper remaining inside after a previous jam.
Inspect areas around:
- Paper pickup rollers
- Tray entrance
- Paper sensor
- Feed path
- Registration area
Remove debris carefully without damaging internal components.
7. Test With Correct Paper
Use paper that matches the printer's recommended size and type.
Make sure the stack is:
- Properly aligned
- Not overloaded
- Not heavily curled
- Within the tray's capacity limit
Then test whether the printer detects the paper normally.
8. Test the Sensor
If realignment and cleaning do not solve the issue, a technician can test whether the sensor changes state correctly when the actuator moves.
This helps determine whether the problem is mechanical alignment or an electrical sensor fault.
9. Check Sensor Wiring and Connectors
Inspect the sensor cable and connectors for:
- Loose connections
- Damaged wires
- Broken connectors
- Corrosion
- Poor contact
A sensor that works mechanically but cannot communicate with the printer's control board may require electrical diagnosis.
10. Replace the Faulty Sensor or Mechanism
If the sensor, flag, actuator, or associated mechanism is damaged, replacement may be necessary.
The correct part should be selected for the exact printer model and tray configuration.
11. Test the Printer After Repair
After realigning or repairing the sensor:
- Install the paper tray
- Load the correct paper
- Power on the printer
- Confirm that the paper status is detected correctly
- Print a test page
- Test multiple sheets
- Check for paper-feed or pickup problems
The printer should correctly detect paper before being returned to the customer.
Why Choose Guru Computer Solution?
1. Experienced Technicians
Our technicians can diagnose paper detection, sensor, tray, pickup, and paper-feed problems systematically.
2. Proper Sensor Diagnosis
We inspect the sensor arm, flag, tray alignment, and related components instead of immediately replacing unnecessary parts.
3. Careful Mechanical Repair
Small printer sensor components can be fragile. Our technicians handle sensor realignment and internal printer mechanisms carefully.
4. Genuine and Compatible Parts
When a sensor or mechanical component requires replacement, we use suitable parts compatible with the printer model.
5. Fast Turnaround
Common paper detection and sensor-related faults can often be diagnosed and repaired without unnecessary delays.
6. Affordable Repair
We identify the actual cause of the “Paper Out” error before recommending expensive component replacement or a new printer.