A PC that won't turn on — no fans, no lights, no beeps — points to two prime suspects: the power supply or the motherboard. The PSU is often the single most frequent point of failure in a completely dead system, especially in an older or lower-quality unit, since it supplies power to every other component. But a dead motherboard produces nearly identical symptoms from the outside, which is exactly why guessing leads people to replace the wrong part.
Why These Two Failures Look Identical From the Outside
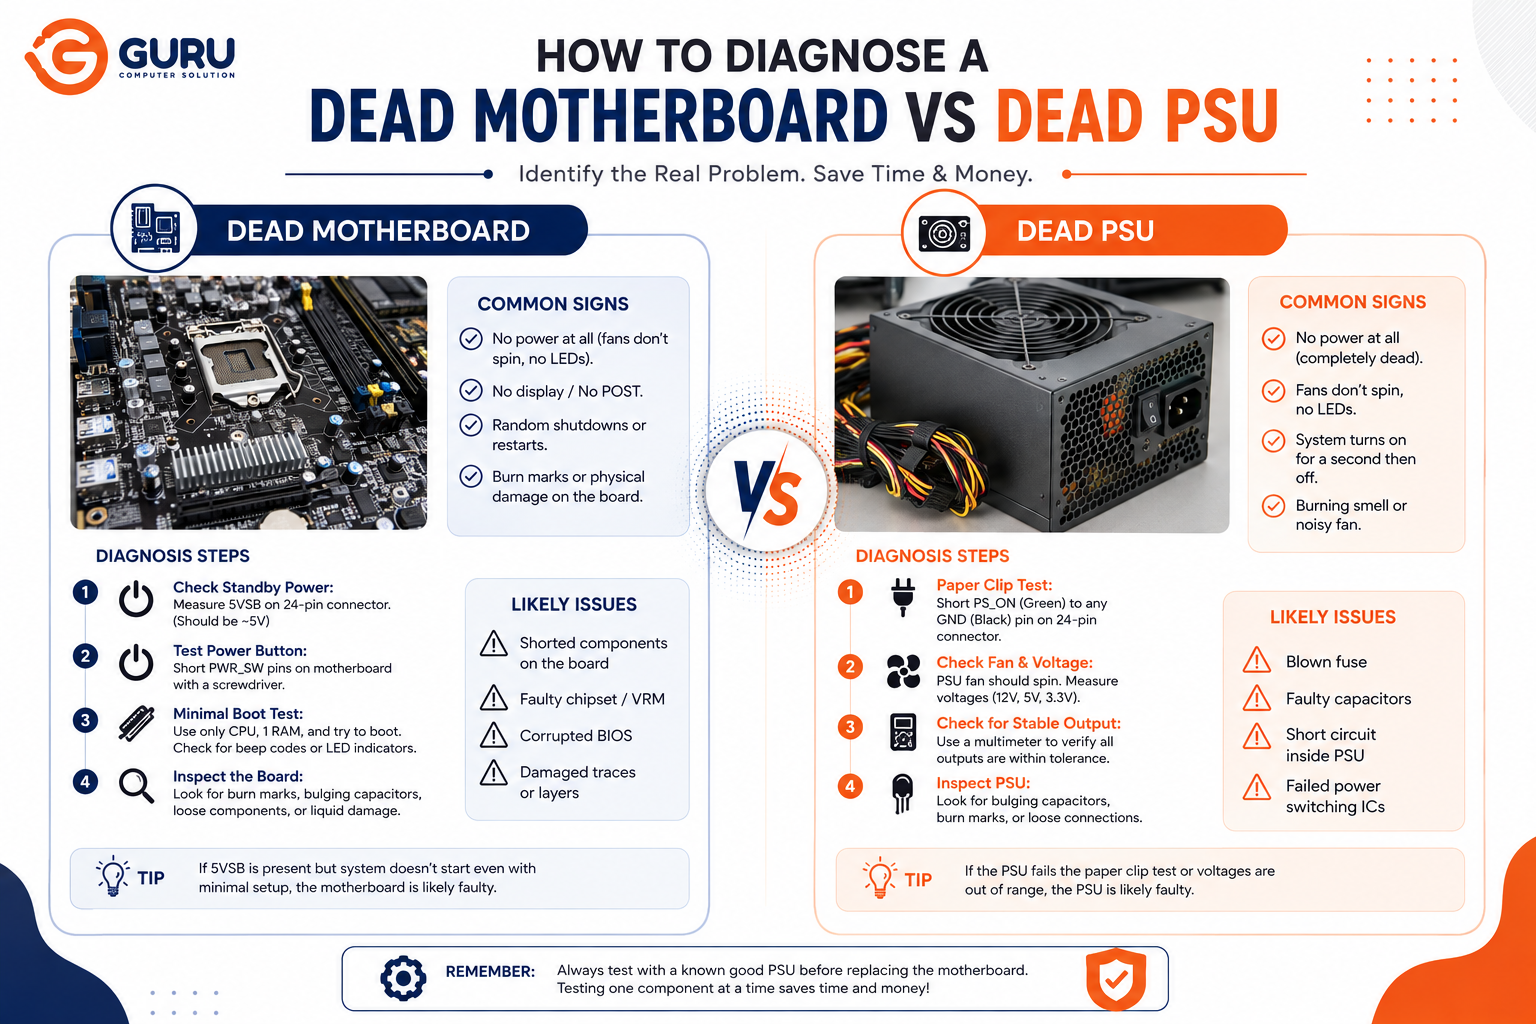
Both a dead PSU and a dead motherboard produce the same top-level symptoms: No response when pressing the power button, no fan spin anywhere in the system, and no indicator lights on the motherboard or chassis. The only way to tell them apart is to isolate each component and test it independently — not guess based on symptoms alone.
Step 1: Rule Out the Simple Causes First
Before testing either component, eliminate the causes that mimic a dead PSU or motherboard but aren't actually component failures. Confirm the rocker switch on the back of the power supply is set to the "I" position, and that the wall outlet and any surge strip are actually live — an accidentally flipped rear switch wastes more troubleshooting time than almost any other single cause.
Also check:
- All power cables are seated firmly, including the main 24-pin ATX connector and the 4/8-pin CPU power cable — loose connections are surprisingly common
- The 24-pin main connector is pressed until the side latch clicks, and the 8-pin EPS connector is properly seated near the CPU — confirm it's the CPU EPS lead specifically, not an 8-pin PCIe graphics lead, since these are easy to mix up on a modular PSU
- All non-essential peripherals (USB drives, printers, external devices) are disconnected, since a faulty peripheral can sometimes prevent power-on entirely
- RAM modules are reseated firmly, since dust or a poor seat on the contacts can interfere with power-on in some systems
If none of these resolve it, move to isolating the PSU.
Step 2: The Paperclip Test (Testing the PSU Alone)
This test checks whether the PSU can power on independently of the rest of the system.
How to do it:
- Unplug the PC from the wall socket completely
- Disconnect all cables from the PSU to the motherboard, GPU, and drives
- Locate the large 24-pin ATX connector, the widest cable coming from the PSU
- Find the green wire (Power On) and any black wire (Ground) on that connector
- Straighten a paperclip and insert one end into the green wire's pinhole and the other end into an adjacent black wire's pinhole
- Plug the PSU into the wall and observe the PSU fan
Reading the result:
- Fan spins immediately → the PSU can power on
- Fan doesn't spin at all → the PSU is very likely dead
The critical limitation most guides don't mention clearly: bridging the green PS_ON pin to ground only confirms the supply powers on outside the system — it says nothing about whether the +12V, +5V, and +3.3V rails are actually holding the correct voltage under load. A PSU can pass the paperclip test and still fail to deliver stable power once real components draw current from it. This is why the paperclip test is a useful first filter, not a definitive pass/fail verdict — a PSU that "passes" can still be the actual culprit.
Step 3: The Swap Test (The Most Reliable Method)
Testing the suspect component in a different, known-working system or testing a known-working component in your system remains the most reliable way to isolate the actual fault.
If you have access to a spare PSU: Connect a known-working PSU to your motherboard. If the system powers on normally, your original PSU was the fault. If it still doesn't power on, the motherboard is the more likely suspect.
If you have access to a spare motherboard or another full system: Testing your PSU in a different PC that's known to work confirms whether it can actually power a full system under load, not just spin a fan with no load attached.
If neither is available: A relatively inexpensive replacement PSU purchased specifically for testing purposes is a reasonable investment if it boots the system, the original PSU was the problem; if it doesn't, the motherboard is the more likely cause.
Step 4: The Breadboard Test (Testing the Motherboard Outside the Case)
If swap testing points toward the motherboard, testing it outside the case — "breadboarding" — rules out a short circuit against the case itself, which is a surprisingly common false-positive cause of a "dead" board.
How to do it:
- Remove the motherboard from the case entirely and place it on a non-conductive surface (its original box, or an anti-static bag)
- Connect only the essentials: PSU (24-pin + 8-pin EPS), CPU with cooler, and a single stick of RAM
- Jump the power button by locating the two PWR_SW pins on the front-panel header and touching them briefly with a screwdriver — these pins are non-polarized, so orientation doesn't matter
- Watch for any sign of life: fan spin, motherboard debug lights, or beep codes if a speaker is connected
Why this matters: A board shorting against the case — from a misplaced standoff, a stray screw, or a case short — can perfectly mimic a dead motherboard, and this test rules that out before you conclude the board itself has failed.
Additional Motherboard-Specific Checks
If the breadboard test still shows no response with a confirmed-working PSU:
Check for a blown fuse or visible damage. Some motherboards have a small onboard fuse that can blow, and boards can also die suddenly without any visible mark of damage.
Try a BIOS/CMOS reset. With the AC power cable removed, remove the CMOS/BIOS battery, hold the power button pressed for roughly a minute to drain residual power, then wait before reinstalling the battery and power cable. This occasionally recovers a board stuck in a bad power state, though it's a last resort rather than a high-probability fix.
Test the power button header directly, bypassing the case's power button and wiring — if the board starts when jumped directly at the header but not from the case button, the fault is the button or its wiring, not the motherboard.
Putting It All Together: A Diagnostic Order
- Check the simple causes (switch position, outlet, cable seating, RAM reseat)
- Run the paperclip test on the PSU — no spin means highly likely PSU failure
- If the PSU passes the paperclip test, don't stop there — proceed to a swap test, since the paperclip test doesn't confirm the PSU holds voltage under real load
- If a working PSU still doesn't power the system, breadboard the motherboard outside the case
- If the board still shows no response when breadboarded, suspect the board itself — check for visible damage and consider a CMOS reset as a last DIY step
When to Stop Troubleshooting and Get a Professional Diagnosis
- You don't have access to a spare PSU or system to swap-test with, and want a conclusive answer rather than a guess
- The board shows visible burn marks, bulging capacitors, or a burning smell, a faint burning smell near the PSU area is itself a warning sign worth stopping for
- You've completed the swap and breadboard tests and results are inconsistent or unclear
- The system is under warranty, where DIY disassembly could complicate a claim
Why Choose Guru Computer Solution
Proper Load Testing, Not Just a Paperclip Check We test PSUs under actual load with dedicated equipment, catching failures a simple paperclip test would miss.
Component-Level Motherboard Diagnosis Where a board shows no response, we trace the fault to the specific failed component — VRM, EC, chipset — rather than assuming a full board replacement is the only option.
Genuine Replacement Parts When replacement is necessary, we source PSUs and boards matched to your system's actual requirements.
Clear, Evidence-Based Diagnosis You'll know exactly which component failed and why before any repair work begins, not a guess based on symptoms alone.
Conclusion
A dead PSU and a dead motherboard look identical from the outside — no power, no lights, no fans — but they require completely different fixes. The paperclip test is a useful first filter, but its biggest limitation is that it doesn't test the PSU under real load, which is why a proper diagnosis moves through swap testing and breadboarding rather than stopping at the first "pass." Working through this process in order gets you an actual answer instead of a guess, and prevents replacing the wrong (and often more expensive) component.
If your desktop won't power on and DIY testing hasn't given you a clear answer, contact Guru Computer Solution for an accurate, load-tested diagnosis.